How To Create A Wedding Budget In YNAB
This post is sponsored by YNAB.
You guys have heard about my love for You Need a Budget (YNAB). I first learned about the budgeting program in March 2016 and have been using it ever since. I cannot imagine life without it! So, naturally when it was time to budget for our wedding last fall, I figured out a way to make a separate wedding budget within my subscription.
One great thing about the YNAB software is that you can make as many budgets as you want. So, creating a budget for our wedding was simply a few clicks away from our household budget, which we could keep in its own bubble. You can use YNAB for any budget you can dream up, whether party planning, an addition on your house, or a big vacation. You can track literally anything that might have expenses beyond your normal household spending.
As I’ve mentioned in my previous posts, you can sign up for a free 34-day trial before paying the monthly fee (less than $10 a month) to continue using the service. I promise, you will save enough from mindfully tracking your spending that it will be worth it 10x over!
 MY OTHER RECIPES
Creating a project-based budget in YNAB is very simple. You can have the whole thing set up in less than 10 minutes.
Start by creating a new budget and giving your project a name!
When it was time to start wedding planning, I searched around for both timelines and budgets. What was frustrating about both of these was that many of the line items did not apply to me because we had an all-in-one venue. For example, we didn’t need any transportation from the ceremony to the reception since they were in the same location. We also didn’t have table rentals or need a separate caterer or cake baker. (Actually, I can’t recommend having an all-in-one ceremony-reception-caterer-accommodation venue enough! It made the whole process so simple and easy, and the Clifton Inn was a dream to work with.)
All this to say that I found most of the sample budgets way too complicated! So, I decided to make my own where I could control the categories myself.
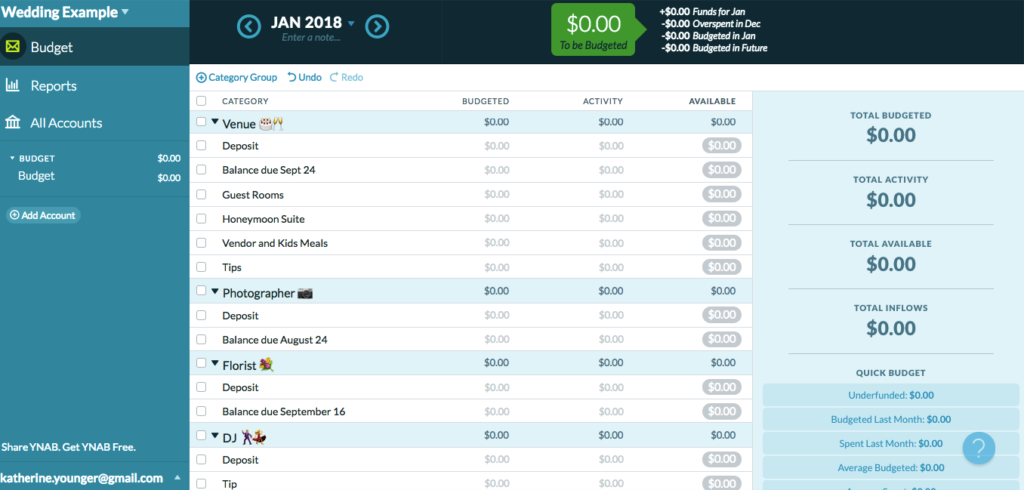
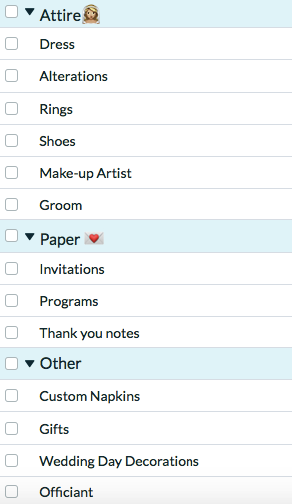
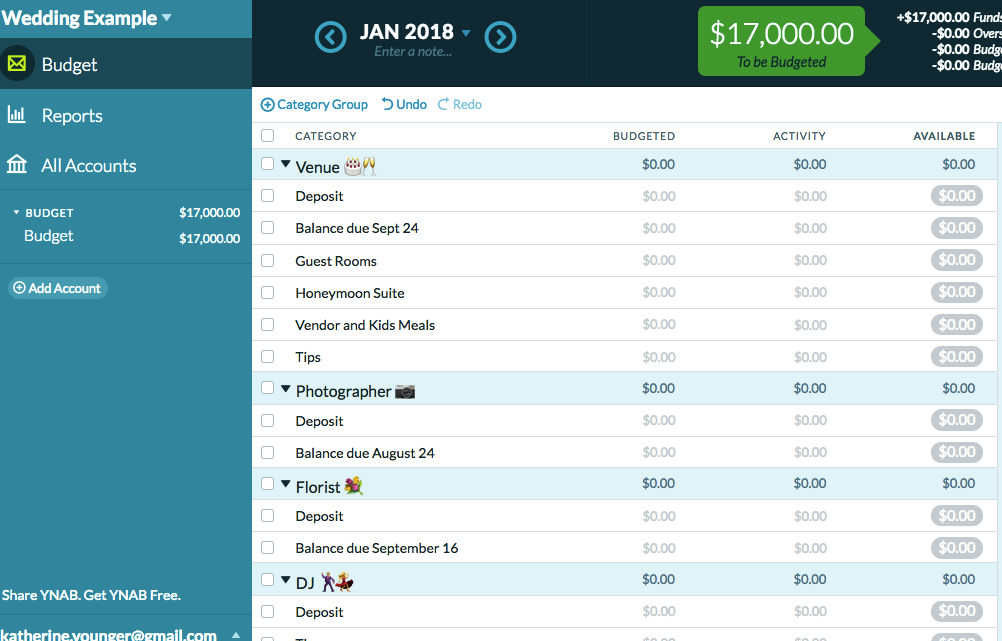
I made several big categories and then created line items within them as needed. Note that on an Apple keyboard, you can bring up the emoji keyboard by hitting Control + Command + Space Bar at the same time. I have emojis all over my household budget too!

What I loved about my own categories is that I could distinguish between the initial deposits and the balances due. This was SO HELPFUL in tracking when everything had to be paid!
Once your categories are all set, you make your initial deposit.

If you get any gifts from your parents or family to help pay for the wedding, you can enter them here too. You want the pretend account to have your total wedding budget. Categorize everything as “To Be Budgeted” here, and make sure these are INFLOW (aka deposits) and not OUTFLOW leaving your account.
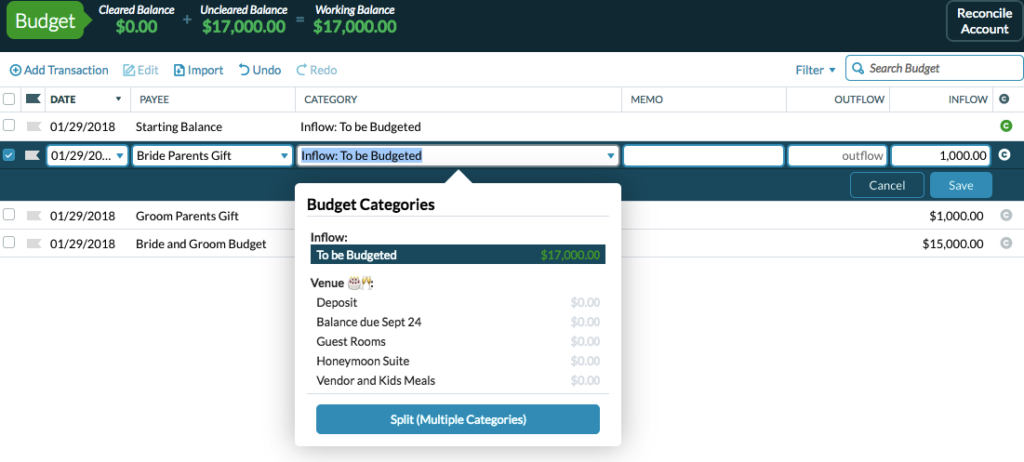
Since this project-based budget was never connected to my bank, everything has to be manually entered, but this gives you the most control. Additionally, since there weren’t a ton of transactions, it was no big deal to enter them by hand and then cross-check with my statements when the charges came through or checks were deposited. Just check the green C when a transaction clears.
![]()
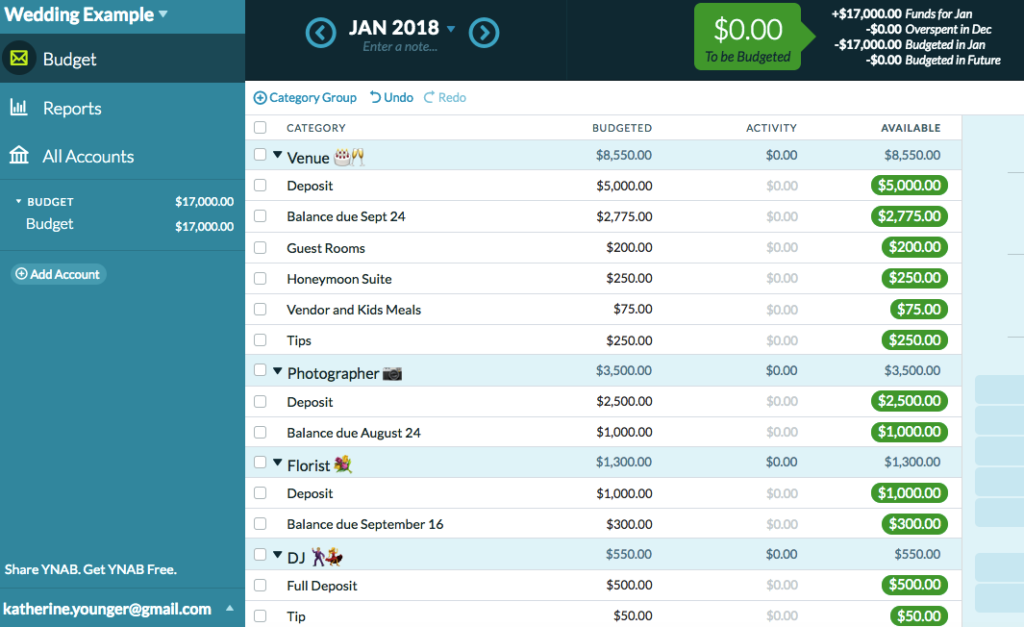
Once you have your budget amounts entered, you will see that you have your total wedding budget ready to give every dollar a job. In my example, where $15,000 comes from the bride and groom and $1,000 from each set of parents, we have a $17,000 total budget ready to be divided up.
At this point, you simply go down through your categories and assign dollars! You might want to have a line item called “Stuff I Forgot To Budget For” because we all know unexpected expenses arise, like an extra guest or alterations! As you budget categories, your “To Be Budgeted” shrinks down.

You can write notes on the sidebar for even more details if you wish.

Your To Be Budgeted will be at $0 and all categories will have plenty of green for spending. You would also be ready to book vendors and put down deposits.
As you pay for things, simply enter the transactions in your pretend bank register. You can even do this on the app while you’re out and about. You can also check your budget during a vendor meeting. The YNAB app is awesome! Add some notes to the memo line if you need to remember a check number or detail.
![]()
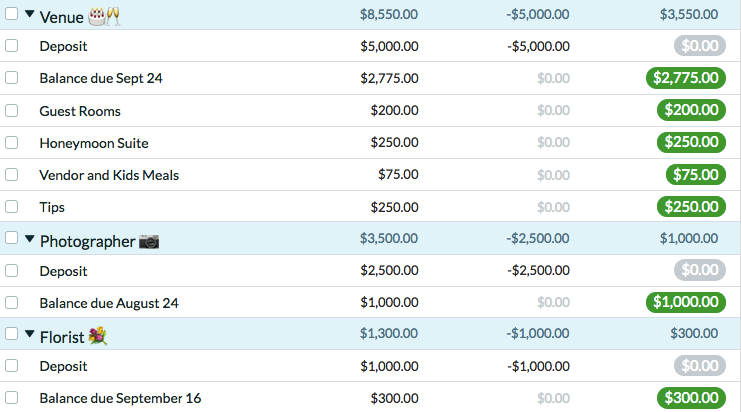
As the transactions come in, the money available in each category shrinks.
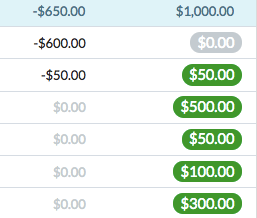
And because we all know nothing ever turns out exactly as planned, it’s so easy to roll with the punches too! If you overspend on your dress, you can move funds around very easily. (This is something that would be much harder to do in a spreadsheet!)
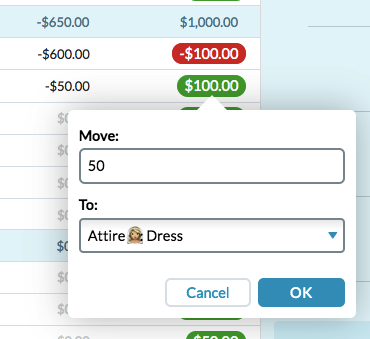
Ta-da! The $50 from alterations and shoes covered the overage on the dress. 🙂
So, there you have it friends: an easy project-based budget in YNAB!
Thanks to YNAB for sponsoring this post!
from Kath Eats Real Food http://ift.tt/2D4EtxD


Comments
Post a Comment